Best Ever Greek Pita: A Warm and Cozy Recipe for Your Table
There’s something irresistibly comforting about fresh bread, wouldn’t you agree? Imagine the golden crust, the soft interior, and the aroma that fills your kitchen as it bakes. This is exactly how I feel each time I make my Best Ever Greek Pita. The delightful memories of my childhood flood back – from family dinners where we’d share stories around the table to Sunday mornings filled with laughter and the smell of freshly baked bread wafting through the house.
As the weather cools and the leaves change, it’s the perfect time to embrace cozy recipes that make you feel good. So, grab your apron and let’s create something special together! This recipe is perfect for an easy weeknight dinner. You can stuff these delicious pitas with whatever your heart desires, whether that’s roasted veggies, creamy tzatziki, or savory meats. This is one you’ll definitely want to pin for later!
Why You’ll Love This Recipe
- Quick and Easy: This pita bread comes together in no time, making it perfect for busy weeknights when you crave something homemade.
- Customizable: Fill these pitas with your favorite ingredients, making them a go-to option for various occasions.
- Impressive and Delicious: Your family and friends will be amazed by your bread-baking skills, and they’ll love how soft and pillowy these pitas are.
- Perfect for Any Meal: Whether as a side or the main dish, these pitas make a fantastic addition to any meal, elevating your dining experience.
- Family-Friendly: Kid-approved, these pitas encourage family involvement in the kitchen—let everyone stuff their own!
What You’ll Need
Gather these simple ingredients to make the Best Ever Greek Pita:
- 1 ½ cups all-purpose flour (plus more for surface)
- 1 tablespoon active dry yeast
- 1 teaspoon kosher salt
- ⅓ cup milk (warm)
- ⅓ cup water (warm)
- 2 tablespoons olive oil (plus more for the bowl and cooking)
Step-by-Step Instructions
Let’s make it together! Follow these cozy steps to create your delicious Greek pitas:
- In a large bowl, combine the flour, yeast, and salt. Mix well to combine.
- Add the warm milk and water, stirring until the mixture comes together.
- Lastly, drizzle in the olive oil and knead the dough in the bowl for a few minutes until it forms a smooth ball.
- Lightly grease a separate bowl with some olive oil. Place the dough inside, turning it to coat with oil. Cover the bowl with plastic wrap and let it rest for about an hour, or until it rises and doubles in size.
- Once the dough has risen, dust your work surface with flour. Gently remove the dough from the bowl and cut it into 8 equal-sized pieces.
- Using your hands, gently stretch each piece into a circle. Roll out with a rolling pin to about ¼ inch thick.
- Form each piece into a circle that is 7-8 inches wide.
- Heat a cast iron pan over high heat and add 1 teaspoon of olive oil. Place one stretched pita in the pan and cook for about a minute. Drizzle a little olive oil on top before flipping it over. Cook for another minute until golden.
- Once all pitas are cooked, you can indulge by smothering them with melted garlic and herb butter—totally optional but wow, is it delicious!
Variations & Creative Twists
Let your creativity shine with these delicious variations:
- Zesty Herb Infusion: Add a blend of dried herbs such as oregano and thyme into the dough for a fragrant twist.
- Cheesy Goodness: Sprinkle shredded cheese into the dough before shaping for a delightful cheesy pita.
- Sweet Delight: Stuff the pitas with a mixture of creamy ricotta and honey for a sweet breakfast option.
- Savory Spice: Mix in some cumin and paprika for a Middle Eastern flair that pairs perfectly with hummus.
Chef Emma’s Helpful Tips
Here are a few secrets to guarantee perfect pitas every time:
- Warm Ingredients: Ensure your milk and water are warm, not hot. This helps activate the yeast for the perfect rise.
- Kneading Technique: You don’t need a stand mixer; just use your hands to knead until you achieve a smooth texture. It’s a great workout, too!
- Rest Time: Don’t rush the resting stage. A full hour allows the dough to rise beautifully for that fluffy texture.
- Storing Leftovers: These pitas are best consumed fresh but can be stored in an airtight container in the fridge for up to three days. Reheat in the pan for that fresh-baked feel.
What’s Inside – Nutrition Breakdown
Here’s the nutrition information per serving (1 pita):
- Serving Size: 1 pita
- Calories: 120
- Carbohydrates: 23g
- Sugar: 0g
- Fat: 3g
- Protein: 3g
- Sodium: 130mg
Frequently Asked Questions
Can I make this ahead?
Absolutely! You can prepare the dough in advance and store it in the fridge overnight.
Can I use different ingredients?
Yes! Feel free to substitute the flour or use dairy alternatives in the recipe.
How do I store leftovers?
Keep them in an airtight container in the fridge for up to three days.
How long does it last?
These pitas can be stored for about three days in the fridge. You can also freeze them for later use!
A Cozy Closing Note
I hope you enjoy making these Best Ever Greek Pitas as much as I do. They’re not just a side dish; they’re a warm hug on a plate, perfect for creating new memories with loved ones. Save this recipe to your Pinterest board for easy access whenever you’re in the mood for a cozy cooking adventure! Happy baking!
Print
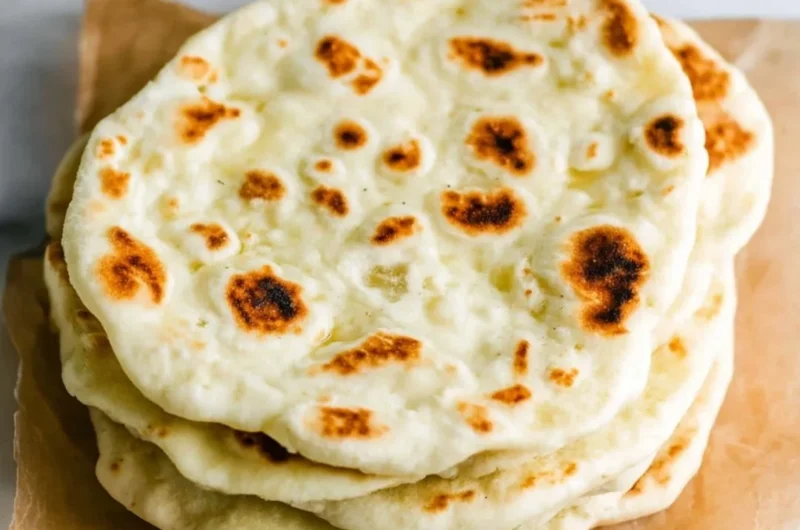
Best Ever Greek Pita
- Total Time: 25 minutes
- Yield: 8 servings 1x
- Diet: Vegetarian
Description
Delightfully soft and customizable Greek pitas, perfect for any meal and ideal for family cooking.
Ingredients
- 1 ½ cups all-purpose flour (plus more for surface)
- 1 tablespoon active dry yeast
- 1 teaspoon kosher salt
- ⅓ cup warm milk
- ⅓ cup warm water
- 2 tablespoons olive oil (plus more for the bowl and cooking)
Instructions
- Combine the flour, yeast, and salt in a large bowl. Mix well to combine.
- Add the warm milk and water, stirring until the mixture comes together.
- Drizzle in the olive oil and knead the dough in the bowl for a few minutes until it forms a smooth ball.
- Lightly grease a separate bowl with olive oil. Place the dough inside, turning it to coat with oil. Cover with plastic wrap and let it rest for about an hour, or until it rises and doubles in size.
- Dust your work surface with flour. Remove the dough from the bowl and cut into 8 equal-sized pieces.
- Stretch each piece into a circle and roll out to about ¼ inch thick.
- Form each piece into a circle that is 7-8 inches wide.
- Heat a cast iron pan over high heat and add 1 teaspoon of olive oil. Cook one stretched pita for about a minute, drizzling olive oil on top before flipping. Cook for another minute until golden.
Notes
Best consumed fresh but can be stored in an airtight container in the fridge for up to three days. Reheat in a pan for fresh-baked feel.
- Prep Time: 15 minutes
- Cook Time: 10 minutes
- Category: Bread
- Method: Baking
- Cuisine: Greek
Nutrition
- Serving Size: 1 pita
- Calories: 120
- Sugar: 0g
- Sodium: 130mg
- Fat: 3g
- Saturated Fat: 0.5g
- Unsaturated Fat: 2.5g
- Trans Fat: 0g
- Carbohydrates: 23g
- Fiber: 1g
- Protein: 3g
- Cholesterol: 0mg